The following blogs are meant for Heather (Beauty's Glance) and for LissaLou so that they can make their own skirts.
Scroll down and start at Part 1.
Saturday, June 30, 2012
Making a skirt - part 4

 This is the first turning up of the hem. I will turn it up again to hide the raw edge, press it, pin it and then sew it by hand. I generally only tack if I am going to machine sew it.
Two things here: this is the waist before it was turned over. Notice the two sides were marginally different lengths. This is why you need to match up these little nicks.
The pattern directions suggested sewing down the the seam allowance so that when you get to the stage of putting the elastic in, it doesn't get entangled in the seam turnover, rather passes through easily.
No photos of the elastic going in so will have to do that on the next skirt.
 Here is CassCass modelling the skirt which was meant for LissaLou - but turned out not to be long enough. LissaLou now has her own skirt - exactly the same, but a bit longer.
Making a skirt - part 3

 Having cut out the back and the front of the skirt , it is time to line them up, right sides together.
On this pattern there are only two places where these little nicks need to be lined up - one on each side just below the waist.
Pin the seams together, then tack them , by hand, using large stitches which will come out easily when you have machined the seams.
 This seam has been machine stitched . The 'seam allowance' is usually about a centimetre or so. It tells you on the pattern how much it should be. I have a mark on the sewing machine that I use to keep the seam straight.
Once you have removed the tacking threads you can knot the threads at the ends, and press the seam open flat.
 This looks like the waistband, turned over and pressed. The raw edge was pressed under to start with. The hem at the bottom would look roughly the same.
I will show you more of the waistband next time.
Friday, June 29, 2012
Making a skirt - part 2

 So, having chosen the correct style and size, you can pin the paper pattern to the fabric.
MAKE SURE THE HENS HAVE THEIR FEET ON THE GROUND!
Then you can start to cut. Keep one hand flat on the paper, and cut along the appropriate line for the size you want.
It was hard to balance the scissors and take this photo with one hand!
 Here is another mark on the paper pattern that you need to take note of. Later you will use the little nick in the fabric to line up the back and the front.
Next you can unpin the pattern and pin it on the fabric again and cut out the other half of the skirt.
Just realised that I didn't tell you about the width of the material. That affects what length you need to buy. Its all in the info on the back of the pattern envelope.
As you prepare to cut out the second part of the skirt, make sure the hens are the right way up. You can probably tell that I have made this mistake, not with this skirt , some other a long time ago!To make a skirt - part 1

 Each pattern envelope will have several different styles it is possible to make from this basic pattern.
Choose the one you want.
There is a lot of information on the back of the envelope. It tells you the actual measurements of each garment, how much fabric is required for each design, how much elastic you will need, or perhaps what length of zip etc etc.
You can see I have cut off some of the surrounding paper, but not all of it
The fabric is folded with the selvage edges together
(Definition: The selvedge refers to the edge of fabric as it comes
off the bolt. The selvedge is the edges of the fabric which has manufacturer
information. This area of the fabric is usually a bound edge that does not fray.
The selvedge of the fabric may also have color dots which show the colors used in the fabric and lines to indicate the repeat of a print on the fabric.
The selvedge of the fabric may also have color dots which show the colors used in the fabric and lines to indicate the repeat of a print on the fabric.
Examples:
It is common practice to match the selvedges of the
fabric to layout a pattern and measure from the selvedge place the grain line on
pattern pieces.)Check the fabric - MAKE SURE THE HENS ARE NOT STANDING ON THEIR HEADS!
If you used a check design, it would look better if the checks on the front matched up with the checks on the back piece.
 There are various marks on the paper pattern which it is just as well to take notice of. This is one of them. This arrow and line mean that this edge of the pattern should lie along the fold of the material. This will end up as the centre back - or centre front. (on making trousers it would be different).
Watch out for parts 2,3,5 etc!
Tuesday, June 26, 2012
The Olympic Park at Stratford.


 The first two photos were taken last October.
The second three were taken this week.
Its looking a lot less like a building site!
Cake and patchwork.

 While Brian was baking and icing this cake . . .
I was busy at the sewing machine, making this mug rug for my friend's birthday present.
Most of the fabric I bought in Guadeloupe.
Tuesday, June 19, 2012
Hamy
 Last Sunday I was asked to do the 'All Age Time' in church. I decided to tell the story of Hamy who belongs to a little girl who sucks her thumb.
These are the photos I used and this is where the story starts.
When the little girl was born, Grandma's good friend, Verona, came to visit.
She brought a present. It was a little white fluffy dog.
Verona's daughters were friends of the little girl's mother.
The little dog had a label that said his name was Hamish, but the little girl couldn't say that name so she called him Hamy.
Hamy went everywhere with the little girl. Here he is
 walk to the park when the little girl was two years old.
 Here he is in Paris. He is on his way to Guadeloupe in the French West Indies. He stayed there for a year, then he came back to London.
The little girl liked to take him to bed and hold him

when she sucked her thumb.
This is in the new house before the new beds came.
Grandma took this photo in June 2012. Hamy is

wearing the little girl's Diamond Jubilee sun glasses.
The little girl is now eight years old.
Last week she sat up straight and said to Grandma, " Do you know what Grandma, Hamy doesn't belong to me!" Grandma was very surprised and wondered what she was talking about. Of course Hamy belongs to the little girl - he's been everywhere with her, for all her life.
"No", the little girl continued, " Mummy told me that God gave Hamy to me to look after. I am Hamy's steward."
Grandma realised that this is what the Bible says in Psalm 24.1
' The earth is the Lord's, and everything in it.'
This made me think about the possessions of which I am very fond - my promarkers, my camera, even my London freedom pass. They all belong to God. I am the steward. That means I have to look after them and use them wisely to do good things to help people.
We finished the all age time by saying together the prayer that comes at the end of our service every week.
Yours, Lord, is the greatness, the power, the glory , the splendour and the majesty;
for everything in heaven, and on earth is yours.
All things come from you, and of your own do we give you.
Lord Jesus Christ, for our sake you became poor.
We offer our lives and our gifts to enrich the life of your world.
Now unto the king eternal, immortal, invisible, the only wise God, be honour and glory for ever.
May the grace of our Lord Jesus Christ, and the love of God, and the fellowship of the Holy Spirit be with us all evermore.
Two notes: The baby in the first picture is not the little girl, its her sister. I couldn't find one of the little girl with Verona.
Its not the same Hamy in every picture! He kept getting lost, and Grandpa bought six or seven in the card shop! We thought there was one left, but so far haven't found it.
Sunday, June 17, 2012
Nature Study.
 Inspired by Heather's blog, I decided to use my promarkers to draw a shrub in the garden.
This is the second attempt to upload the photos with words . . . so there are fewer words this time!


Saturday, June 9, 2012
Make your own Easter Eggs!
 First of all, you need to make a small hole at each end of the egg.
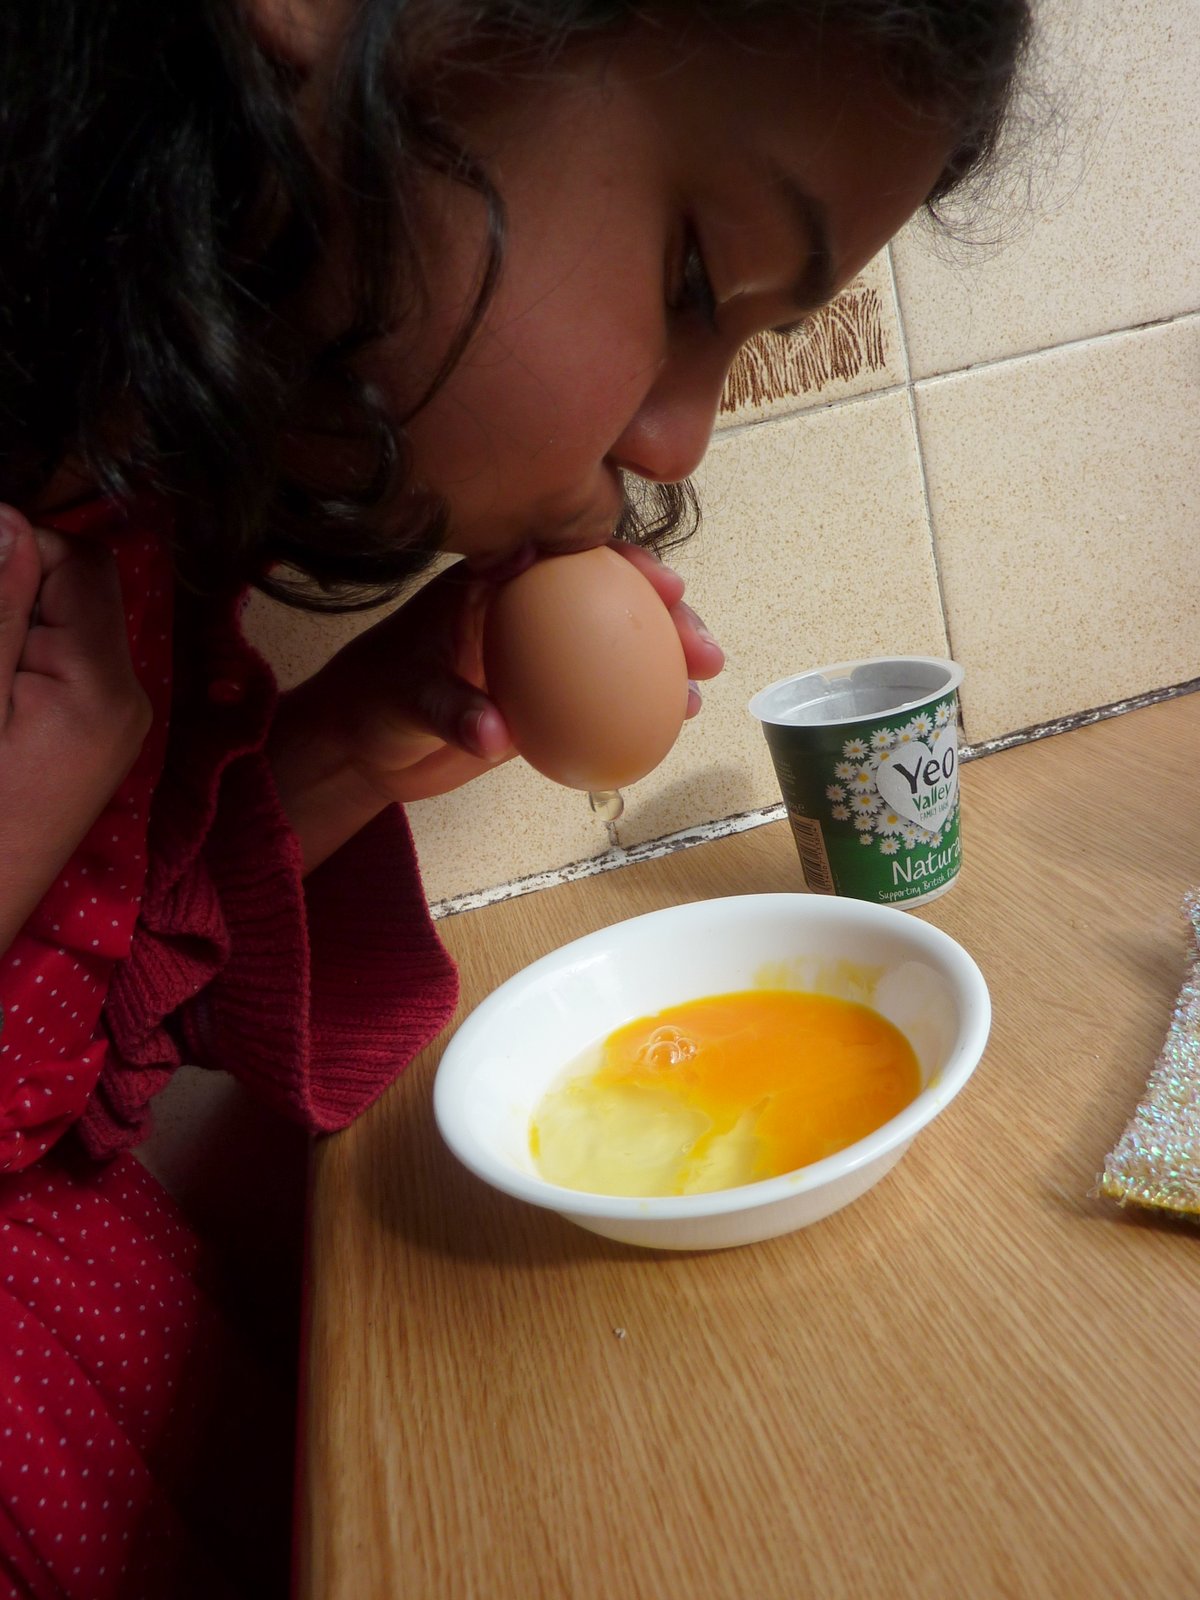
Then you blow in one end.
 and the egg comes out at the other end.
In goes the chocolate . . .

and in the background someone is waiting to lick the spoon!
Early writing.
 JoJo found this strip of old window putty in the garden., and wrote the letters of his name with it.
Look at Heather's blog on teaching writing in her series on Homeschooling.
At this point, JoJo is 4years and 2 months. Notice how it fits in with the idea of first of all learning something with actual objects.
These letters were entirely his idea, and part of his playing.
http://beautysglance.wordpress.com/
This is the link to Heather's blog.


Subscribe to:
Comments (Atom)